
A matter is the central workspace in eBrief Ready where you upload, organise, and share documents for a case or project. Creating a matter is the first step before adding documents, building court books, or sharing with other parties.
Each matter has its own folder structure, member permissions, and settings. You can create as many matters as needed and manage them all from the Matters view.
Prerequisites
- You must have an active eBrief Ready account (Pro, Law Firm, or Law Firm Plus).
- Limited account holders can create a matter but cannot upload documents until the matter is associated with a paying subscriber.
Creating a matter #
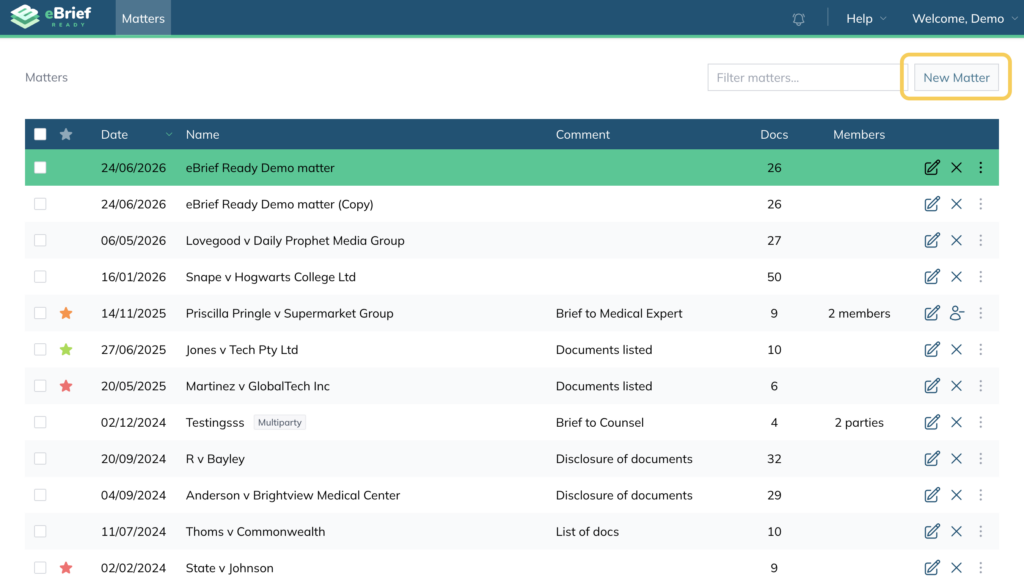
1. Click New Matter in the top right corner of the Matters screen
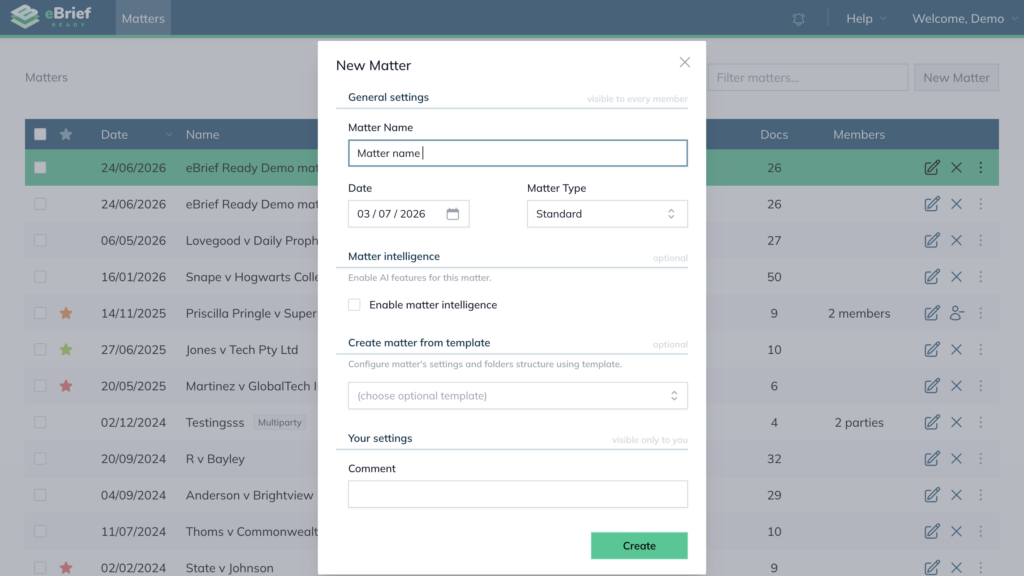
2. Enter a Matter Name and, optionally, select a Date
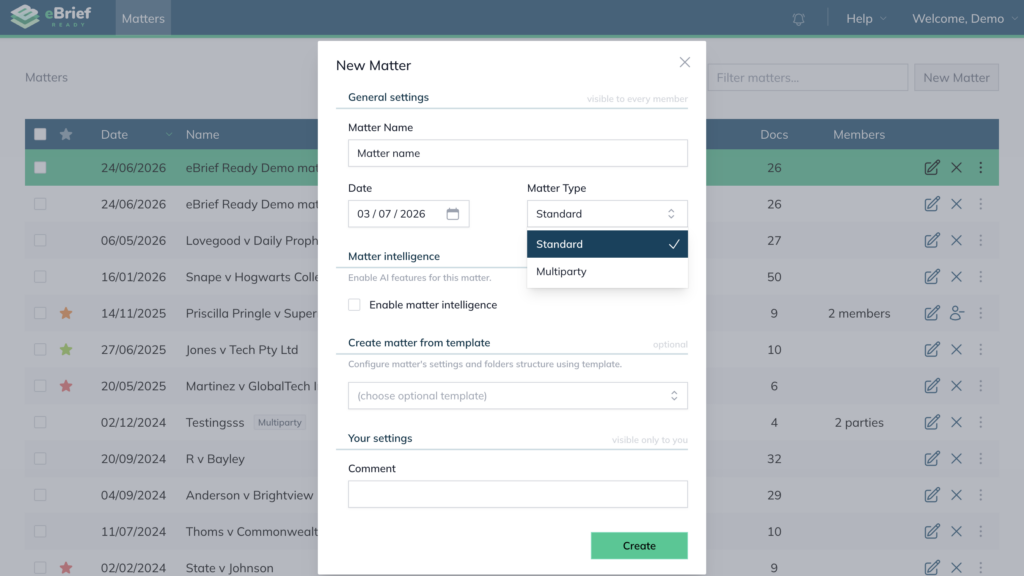
3. Select the Matter Type. Two options are available:
- Standard — the default option for a single-party matter. Suitable for most use cases
- Multiparty — allows multiple parties to work on the matter independently, each with their own private workspace and a shared area. Ideal for matters involving opposing parties, mediators, or the court
Note: Multiparty matters have additional setup steps. See How to create a Multiparty matter for full guidance.
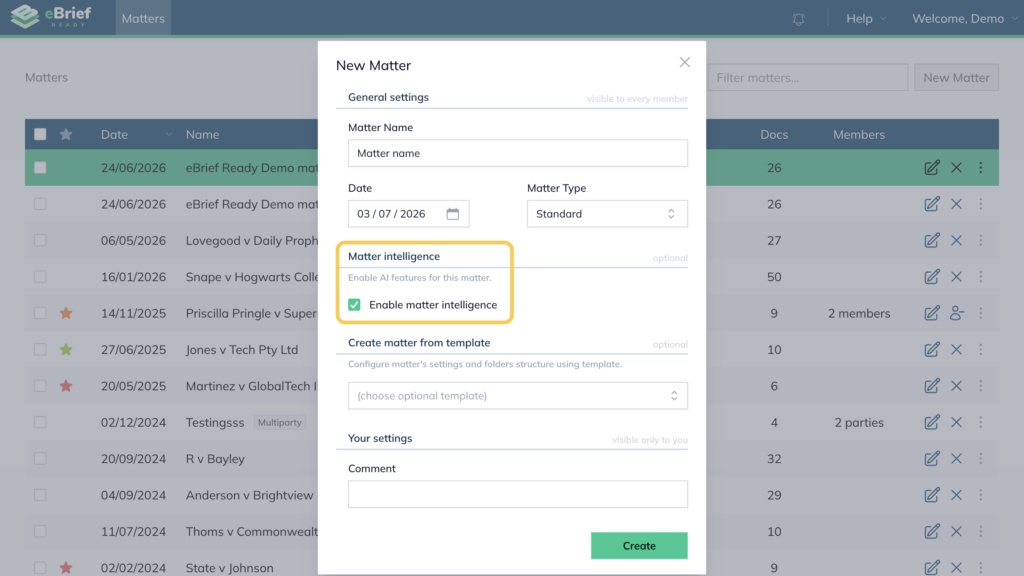
4. (Optional) tick Enable Matter Intelligence to activate AI-powered features for this matter, including Smart Classification, Chronology Builder, and AI Analysis.
This setting can also be changed after the matter is created.
Note: Matter Intelligence requires AI features to be enabled at the account level first. See How to enable AI features for setup instructions.
5. (Optional) Add a Template
Templates store settings, folders, fields and tags to save time.
6. (Optional) Add a Comment
This is a private note visible only to you and will not be seen by other members of the matter.
7. Click Create – the matter will appear in your Matters view
Configuring a matter (optional) #
Once created, you can further configure the matter before adding documents or sharing with others.
Set up folders #
Navigate to Setup → Folders to create your folder structure. You can also apply a prebuilt matter template if your organisation has one saved.
Set a matter number #
If you have Admin rights, you can enable a matter number field upon matter creation.
Navigate to Organsational Admin → Settings → Matter Attributes to enable a matter number or reference ID.
Update your comment #
Navigate to Setup → Matter Settings → Your Settings to add or update a comment. Reminder, comments remain private and are only visible to you.
Organisation and admin considerations #
- Law Firm and Law Firm Plus subscribers can have an Administrator who manages matters on behalf of the organisation/firm, including transferring or deleting matters
- If you belong to an organisation/firm, your administrator may have set default folder templates that apply automatically when a new matter is created
- Administrators can transfer matters between users. Learn more about Organisation Administration.
Editing or deactivating a matter #
Edit matter settings #
To edit a matter after creation, click the Edit icon next to the matter name in the Matters view. You can update the name, date, matter type, and Matter Intelligence setting.
Make a matter inactive #
To remove a matter from your Active Matters view without deleting it, open the matter, go to Setup → Matter Settings, and uncheck Matter is active.
Inactive matters can be reactivated at any time.
Delete a matter #
Only the matter owner or an organisation administrator can delete a matter.
Deleted matters are moved to the Recycle Bin and permanently removed after the retention period set by your administrator.